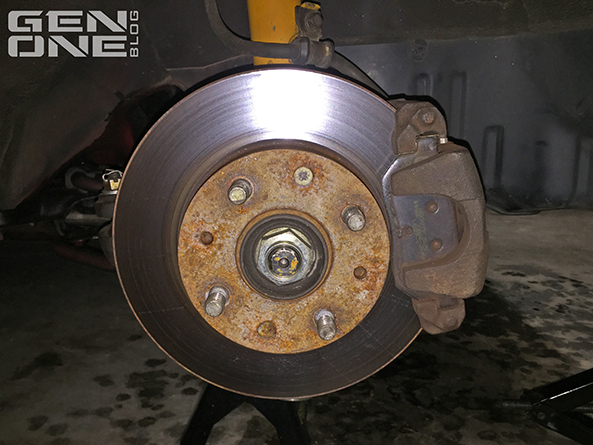
The CRX was due for a front brake change. The factory hardware was worn and one of the rubber boots on the caliper bolt had torn. Now was as good a time as any to make an upgrade. The most common upgrade for these cars is the Integra swap. Sure, it's easy and most people do this, but I wanted to look into something less common, with a more significant performance increase. I remembered reading a couple threads, back in the day, that discussed a 2nd generation CRX brake swap, so I looked into it. Only a few people had done the swap, and the information seemed to vary slightly. However, if it worked, it seemed like it would be a great upgrade option. Not only would the brake rotors, calipers, and pads be larger, but with hardware from a 2nd gen CRX, the aftermarket brake options would increase. So I decided to try it.
This modification was one of the easiest I've done in a long time. You literally just buy the parts, and bolt them on. The important thing here is purchasing the right parts. The specific car you'll be ordering parts for is a 1991 CRX SI. The SI model uses a different caliper than the DX and HF models, which also requires a different brake pad. I ran into some trouble ordering parts because one of the parts distributors did not specify a difference between the lower model CRXs of that year, and the SI model. I had to return the parts and they have since restructured their model designation.
 Parts you'll need to purchase: (1991 CRX SI)
Rotors
Pads
Calipers
Parts I ordered:
Rotors:
Power Stop Brake Rotors
Vendor: Summit Racing
Part Number: JBR-304XPR
Cost: $89.97 (Pair)
Link: https://www.summitracing.com/parts/PWR-JBR-304XPR
Pads:
Hawk HPS Pads
Vendor; Summit Racing
Part Number: HWK-HB113F-590
Cost: $76.97 (Pair)
Link: https://www.summitracing.com/parts/HWK-HB113F-590
Calipers:
Wearever Brake Caliper Unloaded With Bracket (Remanufactured)
Vendor: Advance Auto Parts
Part Number: 19-B1232 - Front Right, 19-B1233 - Front Left
Cost: $42.99 (Each)
Link: http://shop.advanceautoparts.com/p/wearever-brake-caliper-unloaded-caliper-with-bracket-19-b1232/3754111-P?searchTerm=brake+caliper+
Make sure you get the caliper WITH a bracket. You cannot reuse the factory bracket with this new caliper. The only parts that you will reuse from the factory brake setup are the caliper bracket bolts. During the installation, the only issues (not sure they even qualify as issues) I encountered were routing the factory brake lines properly, and filing down the paint on the caliper so the factory banjo could fit into the support. The factory lines have to attach to the caliper at a different angle, causing the line to extend further than they would with the factory caliper. Just adjust the position of your brake line keeper that attaches to the shock, to allow the brake line to move easily when the wheels are turned. One of the calipers had a little excess paint built up on the inside of the banjo support teeth. I just got a file and sanded off the paint so the banjo fitting slipped between the teeth on the caliper.
In regards to wheel fitment, I don't own any factory 13" wheels to test, but there is over an inch of clearance between the outer edge of the caliper and the inner diameter of my 14" BMW Bottlecaps.
 So that's it. Nothing too technical here. For just over $250, you'll be able to reap the benefits of larger rotors, pads, and caliper pistons, all helping to boost your stopping power. Happy tinkering!
Photos by Stephen Dettman


